Where Is Battery Located in 2011 Chrysler 200
Chrysler 200 12V Automotive Battery Replacement Guide
How to change a dead 12 volt car battery in the wheel well of a 1st generation 2011 to 2014 Chrysler 200 with photos.

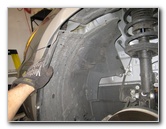
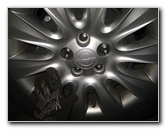
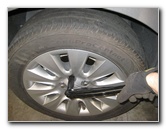
Front Driver Side Wheel
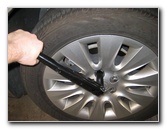
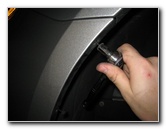
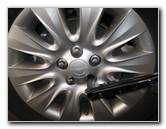
Loosen 5 Lug Nuts
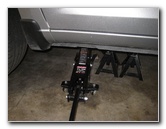
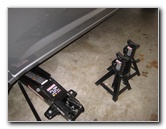
Floor Jack - Raise Vehicle
Owners of other Chrysler, Dodge, Jeep or RAM vehicles such as the Avenger, 300, Town & Country, Challenger, Charger, Dart, Durango, Journey, Grand Caravan, Patriot, Wrangler, Grand Cherokee, Compass, 1500, 2500, 3500, C/V Tradesman and ProMaster may also find these DIY instructions to be helpful.
The tools needed to replace the 12V battery include a lug nut wrench, a floor jack, two jack stands, a 7mm socket with a 1/4" drive ratcheting wrench, a flathead screwdriver, a 13mm socket with a 3/8" drive ratcheting wrench and a 10mm socket.
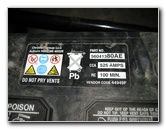
The Chrysler Group LLC brand OEM battery in this 2013 200 sedan is part number 56041380AE.
A few other compatible Group Size 86 replacement batteries include the EverStart MAXX-86 from Wal-Mart, AutoCraft 86-1, Napa BAT 7586 or BAT 8486, Duracell SLI86 or SLI86M and the Odyssey 75/86-PC1230DT.

Spin Off Counterclockwise
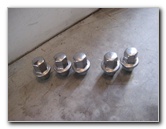
5 Lug Nuts Removed
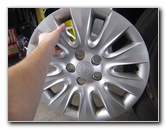
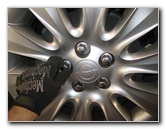
Pull Off Plastic Wheel Cover
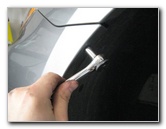
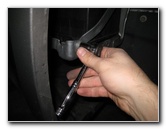
Then slightly loosen the 5 lug nuts on the front driver side wheel with the tire iron.
Raise the front driver corner of the vehicle with the floor jack and securely support it with the two jack stands.
Spin off the 5 lug nuts in the counterclockwise direction and set them aside in a safe place.
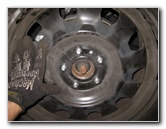
Pull off the plastic wheel cover or "hub cap" and then remove the front wheel.
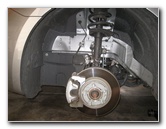
Remove Front Wheel
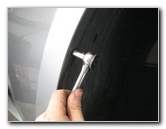
Pry Out Center of Fastener
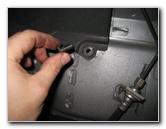
Remove Center Part of Fastener
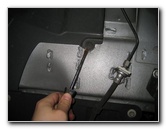
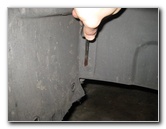
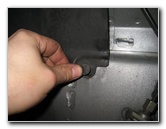
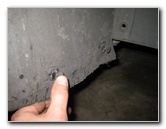
There are 7 plastic pop rivet fasteners and three 7mm screws holding the wheel well liner in place.
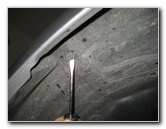
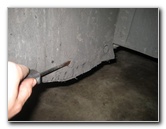
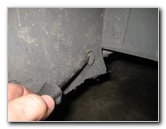
Pry out the center piece of each plastic fastener first with a flathead screwdriver before removing the larger outer piece.
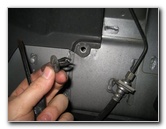
Remove Larger Outer Piece
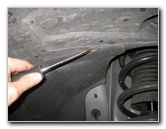
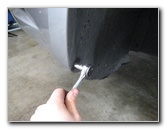
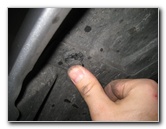
Pry Out Other Fasteners
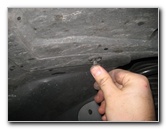
Remove 7mm Screws
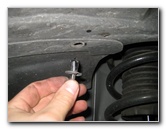
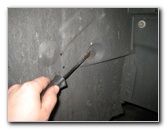
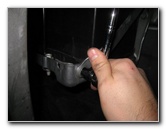
Loosen the three screws along the outer edge of the liner by turning them counterclockwise with the 7mm socket and 1/4" drive ratcheting wrench.
2nd 7mm Screw
3rd 7mm Screw Removed
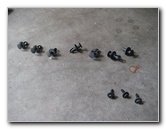
7 Pop Rivets & Three 7mm Screws
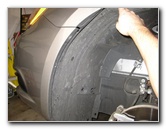
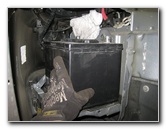
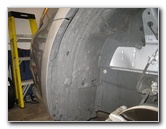
Remove Wheel Well Liner
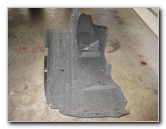
Plastic Splash Guard Removed
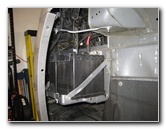
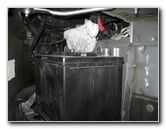
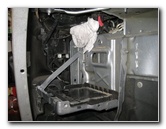
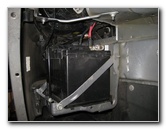
Battery & Tray Exposed
Once the liner or "splash guard" has been removed, you'll be able to see the OEM 12V automotive battery resting on a metal shelf.
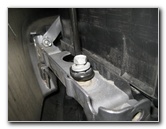
Loosen 13mm Bolt
13mm Bolt Removed
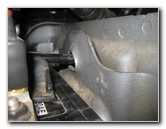
2nd Cross Brace Bar Bolt
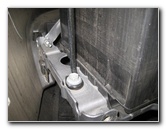
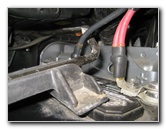
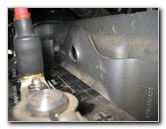
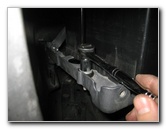
Loosen the upper bolt on the cross brace bar a few turns until the bar can be rotated down and out of the way.
Hold Down Bar Bolt
Remove 13mm Bolt
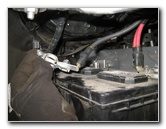
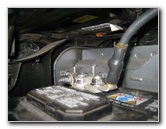
Battery Clamp Removed
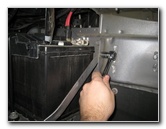
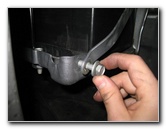
Remove the 13mm bolt on the left (outer) side of the battery to release the hold-down bar.
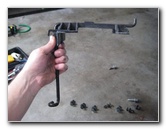
Pull the curved end (hook) at the top of the hold down bar out of its socket. Set the battery clamp aside in a safe place.
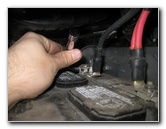
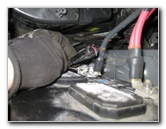
Loosen Negative Terminal First
Pull Off "-" Negative Terminal
Red "+" Positive Terminal
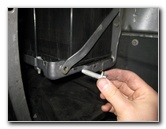
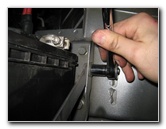
Loosen the nut on the negative "-" (black cable) terminal first by turning it counterclockwise with the 10mm socket and ratcheting wrench.
Pull the "-" negative terminal off the battery post, wrap it in a small towel and tuck it away on the side of the battery to prevent accidental contact.
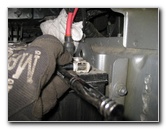
Loosen "+" Counter Clockwise
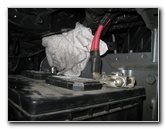
Old Battery Tray & Shelf
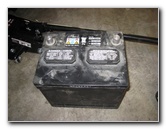
Pull Out Old 12V Battery
Pull the "+" terminal off the positive battery post and place it out of the way to prevent accidental contact.
Carefully lift the old battery off the shelf and place it upright on the ground.
OEM Part # 56041380AE
Clean Off Battery Tray
Insert New 12V Battery
If you can wait a few days for delivery, I recommend buying the Odyssey 75/86-PC1230DT since it has excellent reviews on Amazon.
Clean off any debris from the black plastic battery tray so that the new battery will rest evenly on the shelf.
Carefully insert the new battery in to the wheel well with the "-" battery post furthest from you and the "+" terminal closest to you.
If you've had a problem with corrosion (white or blue powder) building up on the terminals or battery posts, consider installing some felt anti-corrosion washers over the battery posts.

Push On "+" Terminal
Push On "-" Terminal
Tighten 10mm Nut Clockwise
Tighten the "+" terminal by turning the 10mm nut clockwise until it is snug.
Do not over tighten the nut to prevent from damaging the terminal or the battery post.
Then replace the "-" negative (black cable) battery terminal over the negative battery post.
Tighten the "-" negative battery terminal by turning the 10mm nut in the clockwise direction.
Line Up Battery Hold Down
Hole In Metal
Insert Hook Bar In Hole
Re-insert the hook and lower the clamp down over the center of the battery.
Line Up Bar & Bolt Hole
Re-Insert 13mm Bolt
Tighten 13mm Clockwise
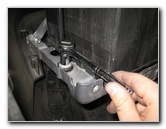
Re-insert the 13mm bolt and tighten it in the clockwise direction.
Re-Insert Cross Brace Bolt
Tighten 13mm Bolt
Tighten Upper Bolt On Bar
Re-insert the 13mm bolt and tighten it in the clockwise direction.
Tighten the upper bolt on the cross brace bar in the clockwise direction.
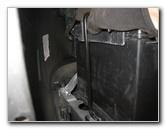
Cross Brace Bar Secured
Line Up Plastic Liner
Push In Plastic Fastener
Re-insert the black plastic splash guard liner in to the wheel well and line up the fastener holes.
Make sure that the smaller center part of each plastic fastener is raised before pushing in the larger outer piece.
Then push in the smaller center part of the pop rivet fastener to secure it in place.
Replace 7mm Screw
Replace Other Pop Rivets

7 Pop Rivets & 3 Screws
Splash Guard Replaced
Replace Front Wheel
Push On Plastic Hub Cap
Spin On 5 Lug Nuts
Spin on the 5 lug nuts by hand in the clockwise direction to prevent them from becoming cross threaded.
Slightly Tighten Clockwise
Lower Vehicle From Stands
Torque To 100 ft-lbs
Lower the vehicle from the jack stands using the floor jack.
Continue progressively tightening the lug nuts in the clockwise direction in a star pattern to about 1/4 turn past hand tight or 100 ft-lbs of torque. It would be best to use a torque wrench or an impact wrench with a torque stick to properly tighten the lug nuts.
Test the new 12V automotive battery by starting the engine and turning on the headlights.
I'd recommend checking that the lug nuts are still tight after your next trip.
Be sure to record the battery change in your vehicle's service records.
For more, check out my other Chrysler 200 DIY Maintenance & Repair Guides.
Where Is Battery Located in 2011 Chrysler 200
Source: https://www.paulstravelpictures.com/Chrysler-200-12V-Automotive-Battery-Replacement-Guide/
0 Response to "Where Is Battery Located in 2011 Chrysler 200"
Post a Comment